- Details
- Category: Bread
How to start baking bread
First, you must decide whether you are having an identity crisis which requires you to invest yourself in what is seen as the basis for human civilization or if you just want high quality, soft, airy bread without going to a top-tier bakery.
Either is okay!
Second, watch a bunch of YouTube videos to get primed for your first attempt (you don't have to watch many or any if you don't want, it isn't that hard).
I found myself with plenty of free time, so I jumped in to baking bread without much of a plan. I ended up making 9 loaves my first weekend. Maybe don't do that.
On Equipment
You can start with limited equipment. A lot of recipes will say to use a Dutch oven or baking stone but you can have success without that. I started with a 9-inch cast iron skillet and a regular baking sheet. At minimum, if you plan to use a baking sheet make sure you have parchment paper or you'll have a very crispy bottom crust.
You can mix the dough by hand to start so you get a feel for the texture (firmness and stickiness of the dough will change based on your room conditions even with a consistent recipe), but I moved on to using a rubber spatula or chopsticks to mix. You'll need at least one large mixing bowl, more will help to have room for proofing/rising.
Most guides will say that baking by weight is essential. That is sort of true, but you will acquire a feel for the dough and can get by without it. I did not buy a kitchen scale for many months and had very few failures after about a dozen loaves. A scale will help you to control for changes in humidity and different batches of flour.
To get a nice crust and to simulate a Dutch oven, I recommend picking up a few disposable aluminum casserole dishes (will explain below).
Whatever you have now, do your best to make a loaf or two, just to see how you feel about it before buying anything.
The First Loaf
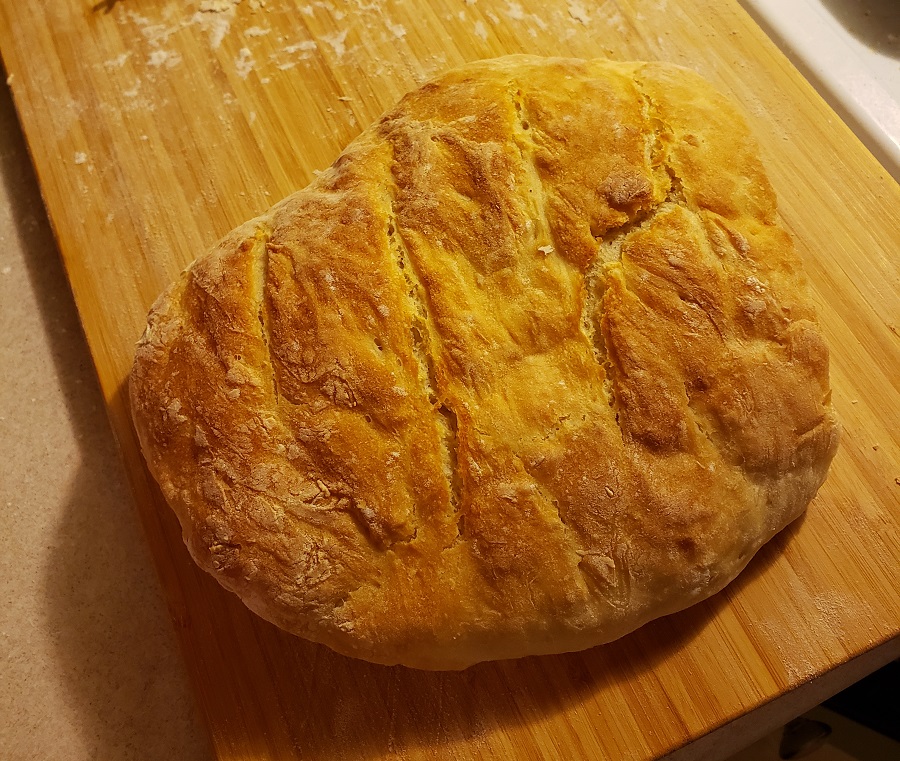 My first loaf wasn't incredible. I didn't use a bread pan so it's sort of a blob (sure, call it a country loaf if you want), but I was thrilled! But baking for yourself means you don't have to worry if it's fantastic: I'm pretty sure you will eat it anyway. I recommend buying King Arthur Flour, even though it is more expensive than other flours on the shelves. I have always had more consistent success with them. Browse their website for the bread that most appeals to you, but here is a list of my favorites. Their all-purpose flour will substitute well into most of their recipes so make that your safe choice.
I used King Arthur Flour to start, but my first recipe was from one of those food blogs that you need to scroll a mile down the page to find the recipe. I chose it because it was the first result when I searched. Seemed reasonable. They're all so similar...but I made adjustments and now have my own standard loaf.
A couple notes before starting:
Your mixture should be about 100°F maximum when you add the yeast. If you aren't using a bread machine, I recommend mixing the yeast in warm water and letting it sit for 5 minutes before starting to activate it. In that case, use lukewarm water from your tap. If you do have a bread machine, follow the instructions it came with, or default to adding all liquids first, then salt and sugar, then flour, and yeast sprinkled over the flour last. With the bread machine method, your water can be quite warm since the cold milk and added flour will cool the mixture.
When replacing sugar with honey, you will not get the same results. The dough will be stickier and a bit denser. I normally add mostly sugar and just a touch of honey.
King Arthur All Purpose flour works very well here, but you can use Bread Flour or Whole Wheat flour from them too. My favorite mixture is 1/3 Whole Wheat:2/3 All Purpose or Bread flour. When using Whole Wheat, you may need to increase the liquid content and add a touch of oil. Adding oil will control the formation of gluten, making your bread less chewy. (Feel free to add oil to any loaf you make to help it last longer before drying out)
- 155 g warm water
- 55 g milk (or almond milk)
- 2 tbsp butter
- 1.25 tsp salt
- 5 tsp sugar (can be replaced with honey)
- 300 g flour (see note above)
- 1.75 tsp Active Dry yeast, or Instant yeast
- Keep a bit of extra water and flour out to adjust if needed
It is totally okay not to use a kitchen scale to start! Here is an approximate volumetric recipe that may need adjusted as the seasons change.
- 2/3 c warm water or just under 1 cup if not using milk
- 1/4 c milk (or almond milk)
- 2 tbsp butter
- 1 tbsp oil (olive or canola is fine)
- 1.25 tsp salt
- 5 tsp sugar (can be replaced with honey)
- 2 1/2 c flour (see note above)
- 1.5 tsp Active Dry yeast, or Instant yeast
- Keep a bit of extra water and flour out to adjust if needed
Putting it all together
This recipe is great for No-Knead Bread. You can knead it if you want to make it airier, but don't overdue it to start. If you want to have a great crumb from the start without much kneeding, just use a very long autolyse. To autolyse, just mix the flour and water together until it forms a sort of smooth dough (no yeast or other ingredients). If you allow the dough to autolyse for several hours or even overnight, you will have a much stretchier dough and will get pockets of air in your final bread. Autolysing is not required and I only do it with sourdough bread, not sandwich. After mixing all the ingredients in the dough, set it in a lightly oiled or floured bowl with a towel over it. Leave it to rise for at least 1 hour, and resist the temptation to check on it every 10 minutes! After an hour and a half, if it has doubled in size, take the dough out, turn it over a few times, punch it down gently, and shape it the way you like. If not doubled yet, let it go longer. You don't need a fancy proofing basket yet, just pop it back into the bowl you had it in earlier or your bread pan if you have one. Now you can preheat your oven to 425°F (if using a cast iron, put that in as well). This is where the disposable casserole dishes can come in: boil a pot of water when you turn on the oven and pour it into the casserole dish before placing the dish on the lowest rack in the oven. If the oven comes to temperature before doing this, that's okay, just wait until you have the water ready to start baking the dough.
This second session of your rise (called proofing) allows your bread to fill out and form pockets of air before baking. Take care when handling the dough after this stage! It will feel soft and airy, so keep it that way! Try to wait 20 minutes after starting the proof to put your dough in...you will regret rushing this.
Place your dough onto your baking surface. Set a timer for 23 minutes. Check it quickly then, but you almost surely need 5 more minutes. You will see a crust forming, but trust me, you want a deep brown crust. As Joshua Weissman says, "We don't do little blonde loaves."
When you pull it out, let it cool for at least an hour, much longer if you can resist. Warm bread tastes great, but you don't want to cut your loaf while it's hot. The interior will be gummy and not as pleasant as you expect.
I recommend sitting and staring at the loaf while it cools to make time go faster.
Bread Machines
 If you see a bread machine at a secondhand store that seems to be in good condition, grab it! I love mine and use it all the time. Learning to bake bread by hand is essential, but a bread machine will make life much easier. I can prepare a loaf in ten minutes and grab it out of the machine to cool 3 hours later. The shape is consistent and you can more easily adjust your recipes without worrying about the effect of your hand mixing.
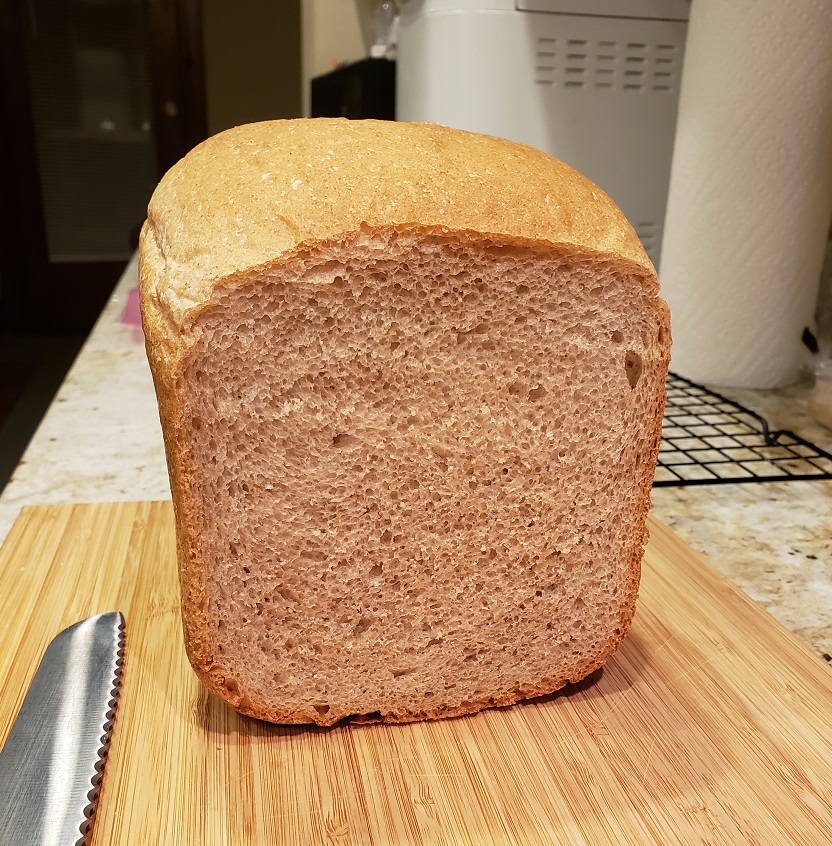
Shown on the left is my standard 1/3 wheat sandwich bread from the recipe above. The crust is not too thick that it hinders eating a sandwich and the interior is strong enough that the bread doesn't fall apart. You can bake it much darker than this, but it makes for less ideal sandwiches. I add about 1 tablespoon of canola oil to each loaf and cut the butter to just under 2 tablespoons (the oil helps the bread stay soft).